How to rent snorkeling or diving gear on Apo Island?
This step-by-step guide is designed to help you effortlessly rent snorkeling or diving gear on the breathtaking Apo Island, a paradise for marine enthusiasts. Understanding the excitement and anticipation of exploring such vibrant underwater ecosystems, this guide offers compassionate and clear instructions to navigate the rental process. From choosing the right gear to finding local rental shops, you’ll be equipped with all the information you need for a seamless and enjoyable adventure, allowing you to fully immerse yourself in the beauty of Apo Island’s marine life. Dive in and create unforgettable memories!
1. Research Rental Shops
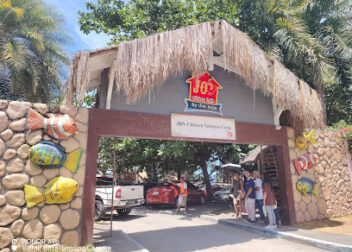
Research rental shops on Apo Island that offer snorkeling or diving gear. Start by searching online for local rental shops, focusing on their websites and social media pages for information on equipment availability and pricing. Read reviews on platforms like Google, TripAdvisor, or Yelp to gauge the experiences of previous customers. Visit travel forums such as Lonely Planet’s Thorn Tree or Reddit’s travel communities, and post questions to gather recommendations from fellow travelers who have been to Apo Island. For instance, ask if anyone has used a specific rental shop they found reliable, or if there are any shops they would suggest avoiding.
2. Choose Your Gear
Evaluate your plans for underwater exploration and determine whether you need snorkeling or diving gear. For snorkeling, gather essential equipment like masks, snorkels, and fins that fit comfortably. If diving is your goal, prepare by selecting tanks, buoyancy control vests, and regulators that suit your dive experience. Ensure all gear fits well and meets safety standards to enhance your underwater adventure.
3. Check Availability
- Identify the rental shops that offer the gear you need. Research online or ask for recommendations to find reliable options.
- Contact each rental shop directly via phone or email. Provide them with specific details about the gear, including sizes and quantities.
- Ask about availability for your desired rental dates. Make sure to mention any peak times, as these can affect stock levels.
- Confirm any rental policies, including deposits and cancellation terms, to avoid surprises later on.
4. Compare Prices
Compile a list of shops that offer the gear you need. Visit their websites or call them to gather price information. Compare the rental costs side by side, making note of any additional fees such as insurance or damage waivers. For instance, if one shop charges $50 for a rental but adds a $20 insurance fee, while another has a rental cost of $60 with no extra fees, calculate the total expenses to determine the better deal. Keep a spreadsheet or a simple notepad to track these details, making it easier to see which option fits your budget best.
5. Visit the Rental Shop
Visit the rental shop in person. Inspect the gear thoroughly to ensure everything is in good condition. Try on the equipment to confirm it fits you properly. Ask the staff any questions you have regarding the equipment and safety protocols. Take note of any specific instructions or recommendations they provide.
6. Complete Rental Agreement
Inspect the gear thoroughly to ensure it meets your satisfaction. Complete the rental agreement by filling in all required details accurately. Read the terms carefully, paying close attention to the return policy and any listed penalties for damages or late returns. Sign the agreement once you understand and accept all conditions, ensuring you keep a copy for your records.
7. Make Payment
Initiate the payment process for your rental by approaching the designated checkout area. Be ready to choose from several payment options, as each shop may have different policies.
- Confirm what forms of payment are accepted; some shops may allow credit cards, while others might only take cash.
- If paying by credit card, ensure you have your card handy for a quick transaction.
- For cash payments, check that you have the right amount, including any potential security deposits or fees.
For example, if you’re renting a bike, the shop might accept Visa and MasterCard, but you should also have some cash just in case they don’t.
8. Pick Up and Test Gear
- Pick up your gear a few hours before your activity to allow ample time for testing.
- Check all components for any visible damage or wear, ensuring everything is in good condition.
- Test each piece of equipment, such as your wetsuit, fins, and snorkel, making sure they fit comfortably and function properly.
- Inflate your buoyancy control device (BCD) if applicable, and verify that all valves and straps work smoothly.
- Adjust any straps or settings to ensure a snug fit, particularly on your mask and fins.
- Familiarize yourself with the controls of any gadgets, like your dive computer or camera, to ensure you know how to use them efficiently.
- Practice putting on and taking off your gear, so you feel confident and comfortable before getting into the water.
Final Tips and Recommendations
In conclusion, renting snorkeling or diving gear on Apo Island is an easy and enjoyable process when you know what to do. By taking the time to research local rental shops, asking the right questions, and ensuring your gear fits well, you’ll set yourself up for an unforgettable underwater adventure. So gear up and dive into the stunning marine life that Apo Island has to offer! Happy snorkeling!
Essential Gear Checklist
- Local maps or travel guides
- Rental shop contact numbers
- Gear selection checklist
- Rental agreement template
- Payment method (cash or card)
- Large bag or backpack for gear transport
- Personal snorkeling or diving logbook (optional)
- Personal identification (ID or passport)
- Water-resistant phone case (optional)
- Towel for drying off
Maximize Your Experience
- Research Local Shops: Before your trip, look up snorkeling and diving gear rental shops on Apo Island to find reliable options
- Check Reviews: Read reviews on platforms like Google or TripAdvisor to gauge the quality of the gear and service from different rental shops
- Ask About Gear Condition: When you arrive at a rental shop, inspect the equipment for wear and tear. Don’t hesitate to ask how often the gear is maintained
- Inquire About Sizes: Make sure the shop has a variety of sizes available for masks, fins, and wetsuits to ensure a comfortable fit
- Book in Advance: If you’re visiting during peak season, consider reserving your gear in advance to secure availability
- Understand Rental Policies: Familiarize yourself with the rental terms, including damage policies, deposits, and insurance options
- Request Recommendations: Don’t hesitate to ask locals or fellow travelers for their recommendations on the best rental places
- Check for Extras: Some shops offer additional services like guided tours or equipment delivery to your accommodation, so ask about these options
- Compare Prices: Take a moment to compare prices between different shops to ensure you’re getting a fair deal
- Look for Package Deals: Some shops offer package deals that combine gear rental with guided snorkeling or diving trips, which can save you money
- Inspect Safety Equipment: Ensure that the rental shop provides safety gear, like life vests and whistles, especially if you’re a beginner
- Ask About Local Regulations: Familiarize yourself with any local guidelines or regulations regarding snorkeling and diving to ensure a safe and enjoyable experience
Exploring Apo Island: A Guide to Attractions
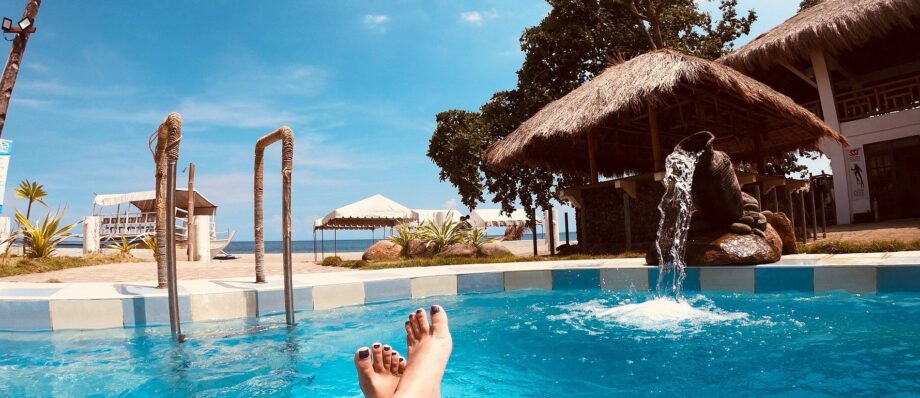
- Explore Marine Sanctuaries: Don’t miss the Apo Island Marine Reserve, where you can snorkel or dive with vibrant corals and diverse marine life. It’s a great spot for beginners to get up close with nature
- Savor Local Cuisine: Try the fresh seafood at local eateries. Dishes like grilled fish and shrimp sinigang (sour soup) are must-tries. Don’t forget to sample some traditional Filipino desserts!
- Engage in Island Activities: Look for activities like guided hikes to the lighthouse for stunning views, or join a local tour to learn about the island’s history and culture. It’s a fun way to immerse yourself in the local vibe
- Choose Comfortable Accommodation: There are various options, from cozy guesthouses to beachfront resorts. Look for places that offer a good balance of comfort and affordability, and check reviews for a better idea of what to expect
- Enjoy Relaxed Entertainment: In the evenings, relax by the beach or join a bonfire with fellow travelers. Some spots may have live music or cultural performances, so keep an eye out for local events!
- Enjoy your trip to Apo Island!